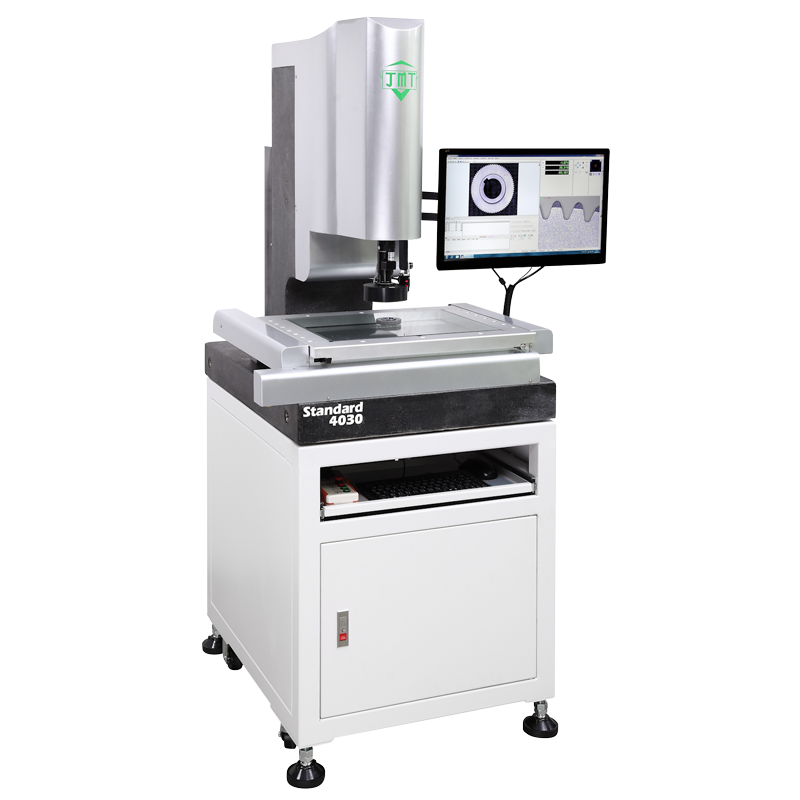
JMT Image Measuring Instrument

Applications:
It can quickly detect the contours, surface dimensions, angles and
positions of various complex and precision parts, especially the
micro-detection and quality control of precision parts, and can be
used in product development, two-dimensional copying and other
fields. Applicable to the following industries.
- Semiconductors, such as reticle, wafer, system wafer, complementary metal oxide semiconductor, etc.
- Package components, such as TSOP, SOP, QFP, BGA, etc.
- PCB products, such as IC boards, module boards, flexible boards, etc.
- TFT LCD screen, such as backlight, LCM, BUL, etc.
- Electronics, such as test stands, multilayer ceramic substrates, inductors, capacitors, electronic components, etc.
- Rubber and plastics, such as O-rings, camera components, connectors, etc.
- Stamping products, such as lead frames, motor cores, precision sheet metal, watch parts, springs, etc.
- Precision parts, such as precision molds, tools, mechanical parts, etc.
- Optical communication components, ceramic ferrules, light sensors, etc.
- Military, aerospace, universities, research institutions, etc.
Product Introduction:
| Model | JMT Automatic CNC | ||
|---|---|---|---|
| JMT 3020 CNC | JMT 4030 CNC | JMT 5040 CNC | |
| Measuring Schedule(mm) | 300x200x200 | 400x300x200 | 500x400x200 |
| Grating Scale Resolution (um) | 1um Triaxial Optical Ruler | ||
| Measuring Accuracy | (3.0+L/200μm) | ||
Product Feature:
- With powerful image software, it has a variety of automatic edge finding functions, geometric measurement, complex construction functions, and can be used with probes, as well as dual functions of image and probe.
- The software supports multiple languages and is convenient for people from all over the world.
- The software supports powerful jigsaw function, which can stitch the photo of the workpiece into a map and a physical photo. The customer can use the map to navigate, and the available measurement size can be used for the customer to see the size. The customer can measure the result at a glance.
- Support auto focus, contrast measurement, super automatic deburring function, joystick operation.
- Directly export and import DXF files for editing, suitable for batch detection.
- Granite base and granite columns to reduce deformation coefficient and increase stability.
- Cast aluminum working platform, anodic hard film treatment, good stability and high precision.
- High-precision optical ruler (0.001mm) for three axes.
- High-precision multi-mode compensation allows each instrument to ensure ultra-high precision.
- The table drive system uses a high-precision toothless screw drive system with a servo-controlled motor drive.
- Foreign imported measuring lens/1X eyepiece, 0.7~4.5X six-segment zoom objective (image magnification is about 30x~180x).
- Mirror (optional) 0.5X, 2X.
- Foreign import 1/3 measurement special color CCD (others use software to correct aspect ratio and curvature deformation to solve the error caused by CCD).
- Light source with LED luminescence for fine-tuning, programmable two-way light source (bottom light and surface light source).
- The surface light source uses a five-ring, eight-way, full-view rotating light source system.
- The program controls brightness, contrast, and brightness to complement the changing needs of the lighting system.
- Instrument accuracy XY (3.0+L/200) um.
- L is the measured distance in mm. Accuracy is based on ISO 10360-7 or ISO 10360-2 specifications.
- Powerful Software
- Perfect support for Win7 operating system.
- Further streamline operations.
can import 100,000 elements at the same time; simplify the process of DXF import programming; modify CAD default settings; export IGES files to support Gerber file import measurement, reduce the programming workload of PCB board measurement Import curve for measurement.
The edge-finding function is greatly enhanced:
The innovative pre-finishing function reduces many unnecessary attempts and improves measurement efficiency; the weak edge function makes it easier to grasp the borders even if it is not so clear or difficult to identify with the naked eye.
Powerful curve function:
The curve can be scanned along any curve; the diameter of the circle can be measured by the free curve.
Powerful scanning capabilities:
Effectively filter out unwanted points, optimized algorithms can store a large number of scan points without slowing down the program.
Powerful focus function:
Unique focus algorithm for fast focus in seconds, 0.003mm repeatability for simple height measurement and flatness measurement.
Simple but powerful reporting features Report diversification:
EXCEL report setup is simple: divided into preset reports and customized reports, redesigned settings, get rid of the complexity of EXCEL report settings, more practical, more concise.
Complete tolerance evaluation system:
Evaluation of almost all dimensional tolerances, shape tolerances and position tolerances, tolerance evaluation for 2D and 3D.
Reverse engineering:
Powerful scanning capabilities combined with CAD support capabilities make the reverse more realistic.


